

Electric car and Home Assistant
Under Integrations in the menu, you connect your electric car and your Home Assistant. Both are marked Beta: they work, but haven't yet been tested with all makes and setups.
Connect your electric car
GridZeno reads the car through the car maker's own app: the battery, whether it's charging, and when it has charged.
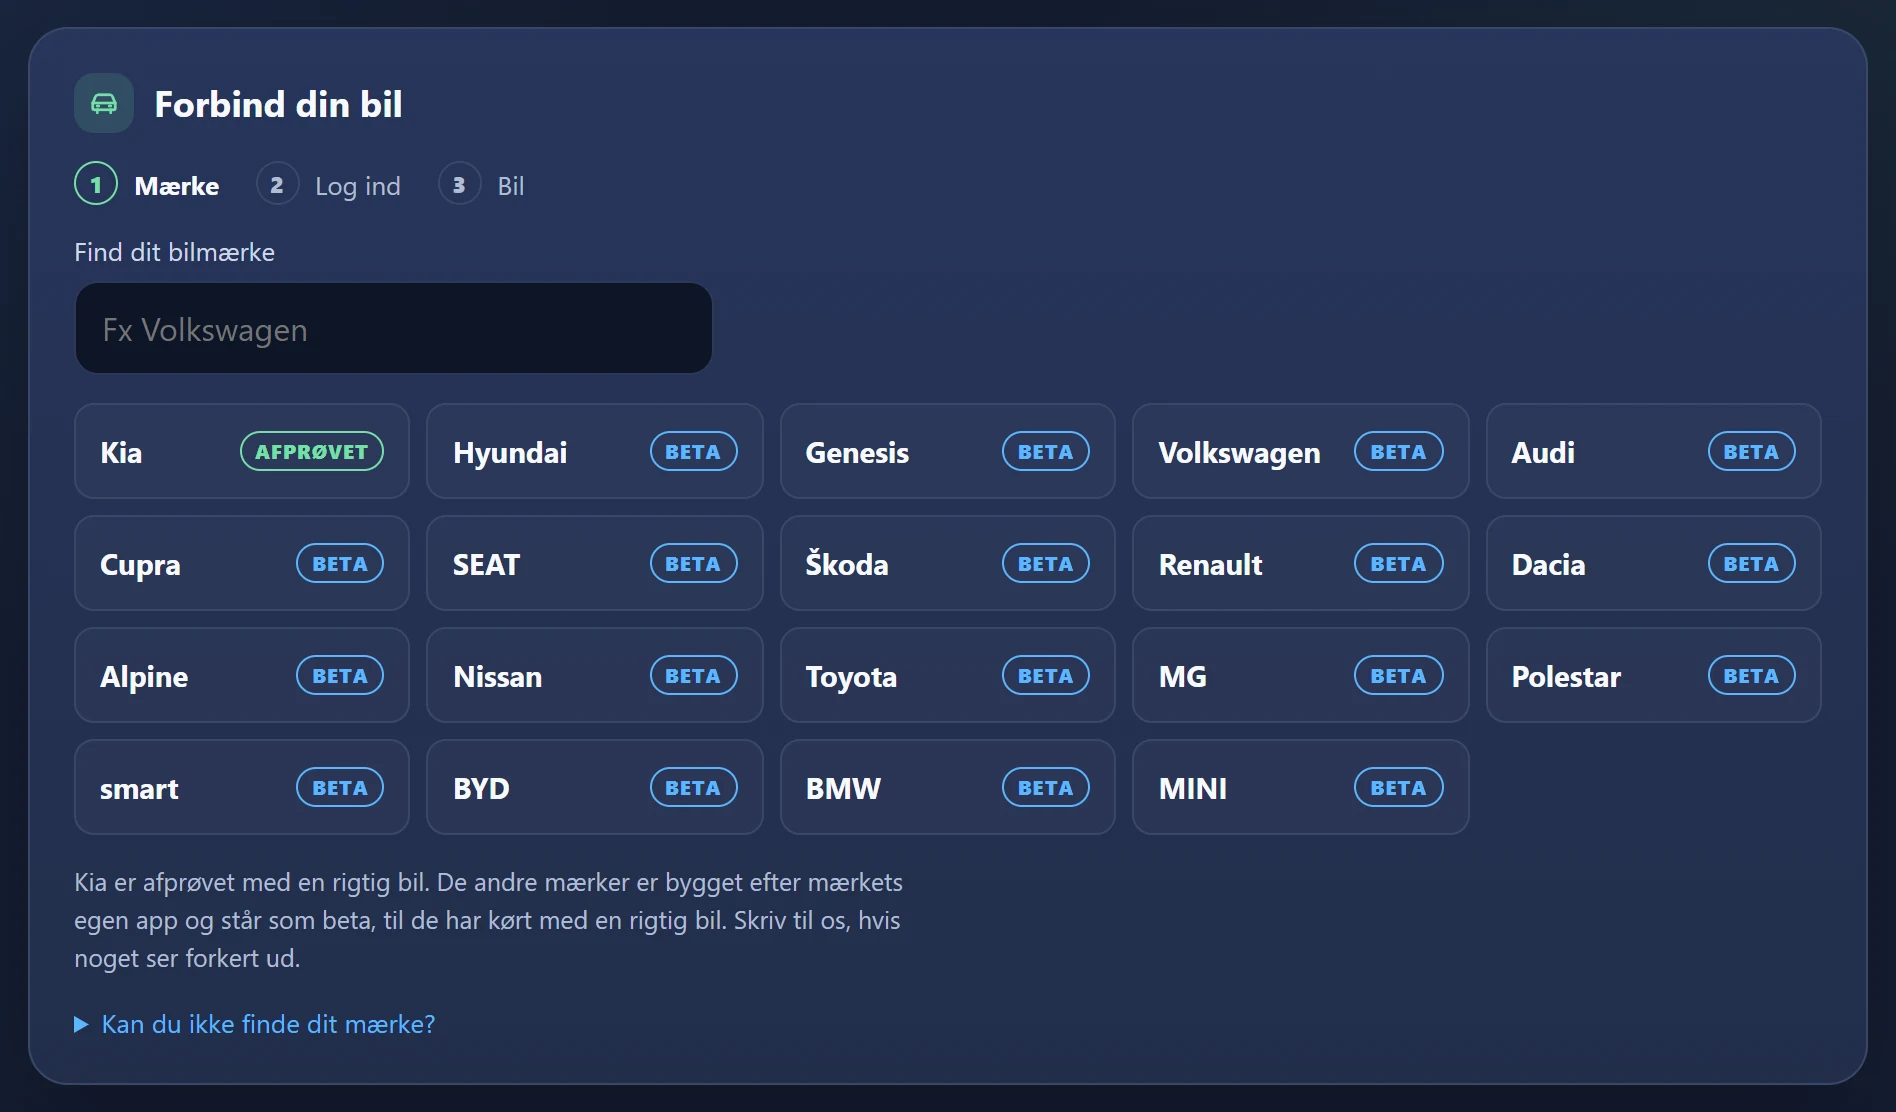
- 1Go to Electric car
Under Integrations in the menu.
- 2Find your car make
Type the make, or choose it from the list. Kia has been tested with a real car; the other makes are listed as beta. If your make isn't there, expand Can you not find your make? to see why.
- 3Log in with the car's app
Enter the e-mail and password you use in the car maker's app, and press Connect your …. GridZeno stores them encrypted and only uses them to fetch the car's status.
- 4Choose the car
If you have several cars on the account, you choose which one GridZeno should read, and press Connect the selected car. You can connect the others afterwards with Connect another car.
GridZeno doesn't control the car or the charger yet, and the house's plan doesn't take the car into account yet. We never store the car's position.
The car's status
The battery, the range, and whether the car is charging.
At the top is the car's battery in percent with a line for your target, whether it's plugged in and charging, the range, and when the car last reported in. GridZeno fetches the status by itself at regular intervals, without waking the car. Press Fetch status now, if you want the latest straight away.
If there's a login error, for example because you have changed your password in the car's app, press Connect again.
The charging profile
When the car should charge to be ready for departure: first sun the system would otherwise sell, then the cheapest quarter hours.
The charging profile is a suggestion. Until GridZeno can control the charger, you set the time yourself in the car's or the charger's app. The profile is calculated from now, even when the car isn't plugged in, and is recalculated as time goes by.
- Included in the plan
- When it's on, GridZeno makes a charging profile for the car. Turn it off when the car isn't going to charge at home, for example on holiday.
- Charge to 100 % before departure
- The car is charged fully for the next departure and then goes back to your target.
- Charge fully now
- At full power from now, whatever the price, to 100 % or for at most 24 hours.
- Back to …
- Shown while one of the two is running, and stops it again.
The profile shows each charging window with kWh, of which solar, and the price, and what it costs compared with charging straight away. If it's missing something, for example the car's state of charge or tomorrow's prices, it says so.
Charging
How much the car needs, and when it leaves.
- 1Choose Charge the car to
80 % is good for the battery for everyday use. The car's own limit wins if it's lower.
- 2Enter When does the car leave?
A time per weekday. Same time every weekday as Monday copies Monday. Leave the field empty on days without a departure. Without times, 07:00 is assumed.
- 3Optionally the car's own ceiling
The car's own charger on alternating current, for example 7.4 or 11 kW.
- 4Choose whether the house battery may charge the car
When it's cheapest. Only applies under Maximise self-consumption and Maximise savings, and is used when the house's plan takes the car into account.
- 5Press Save
The charger
Then GridZeno knows how fast the car charges, and what price it pays.
- 1Press Add your charger
- 2Choose make and model
For example go-e, Easee or Zaptec.
- 3Phases and current
1 or 3 phases and the current per phase, typically 16 A. If the charger can switch to one phase, tick the box; then the car can charge on solar from about 1.4 kW.
- 4Answer Is the charger behind the system's meter?
Yes, if it gets power from the same consumer unit and meter as the house. No, if it has its own meter, for example from a charging operator.
- 5Press Save the charger
Without a charger, the profile calculates with an ordinary 11 kW home charger.
Charging sessions and removing the car
The last 30 days of charging sessions.
Under Charging sessions you'll find each charging session with time, percentage and kWh, and whether it showed in the house's consumption, that is, happened behind the system's meter. Under The battery in the car you can correct the battery's size if the car's own figure is wrong.
Press Remove next to Remove the car, and confirm. GridZeno then forgets your login to the car's app, the car's reports, the charging sessions and your times.
Home Assistant
Your system in Home Assistant, directly from the dongle on your own network, even without internet.
The integration hasn't been released yet, and the dongle will get the firmware Home Assistant talks to in an update. The Home Assistant page under Integrations already shows how it will work, and what you get: solar, consumption, the grid, the battery and the plan, and with Smart and Pro also your prices and the solar forecast.
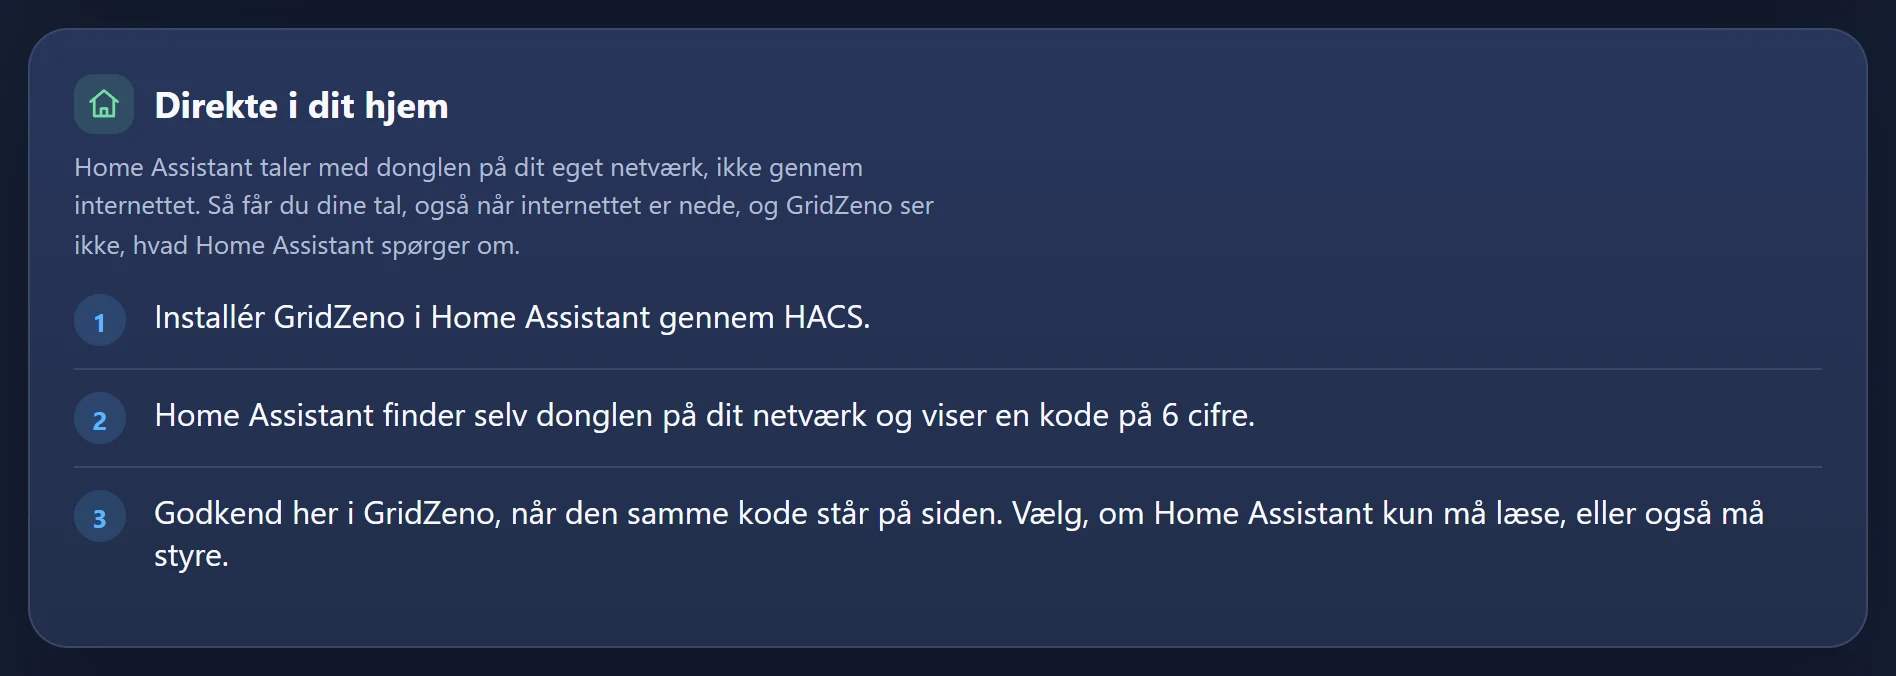
When GridZeno is in control, Home Assistant can only read. If you control it yourself under Automatic, a Home Assistant with permission to control can decide over the battery and selling, always within the battery's limits. The whole process in Home Assistant is in the guide to Home Assistant.
Approve a Home Assistant
Only you can give a Home Assistant access.
- 1Add GridZeno in Home Assistant
Home Assistant finds the dongle by itself and shows a 6-digit code.
- 2Open Home Assistant in GridZeno
Under Waiting for you, the request is shown with the name and the code.
- 3Check that the code is the same
If a different code is shown, press Refuse.
- 4Choose Read only or Read and control
Read only gives measurements, the plan and the prices. Read and control also gives the battery and selling, when you're in control yourself.
- 5Press Approve
The dongle is told in a moment.
Under Connected you'll find the Home Assistants that may talk to the dongle. Remove access stops one of them. The dongle's own page can also approve a Home Assistant to read only.
Ready for cheaper
power?
Check whether your inverter fits, and let the plan charge the battery and sell power in the right quarter hours.